Step 1
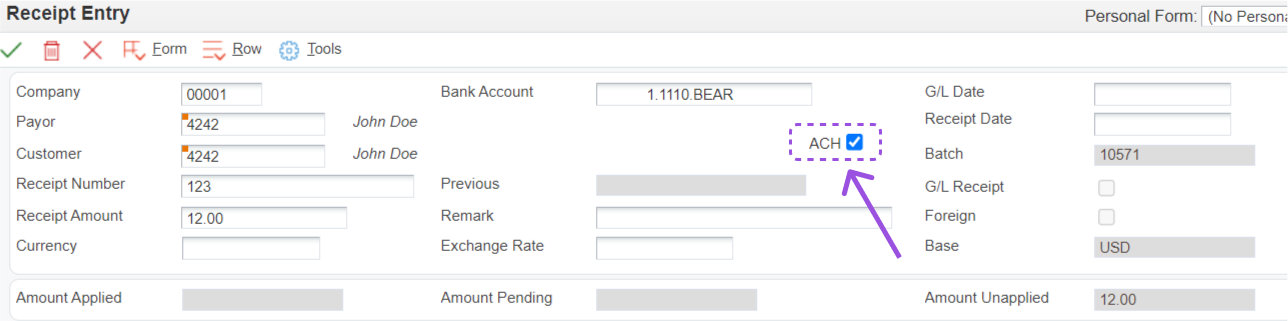
Go to the standard receipts entry program (P03B102), press add and fill out all the information pertaining to the payment. You will still select invoices to pay as you do during standard receipt processing. Once all information is filled out and invoices are selected be sure to check the ACH box as seen below. Please note the ACH check box is available depending on the processing options set in the P03B102. Once you are ready to proceed press the OK button.
Step 2
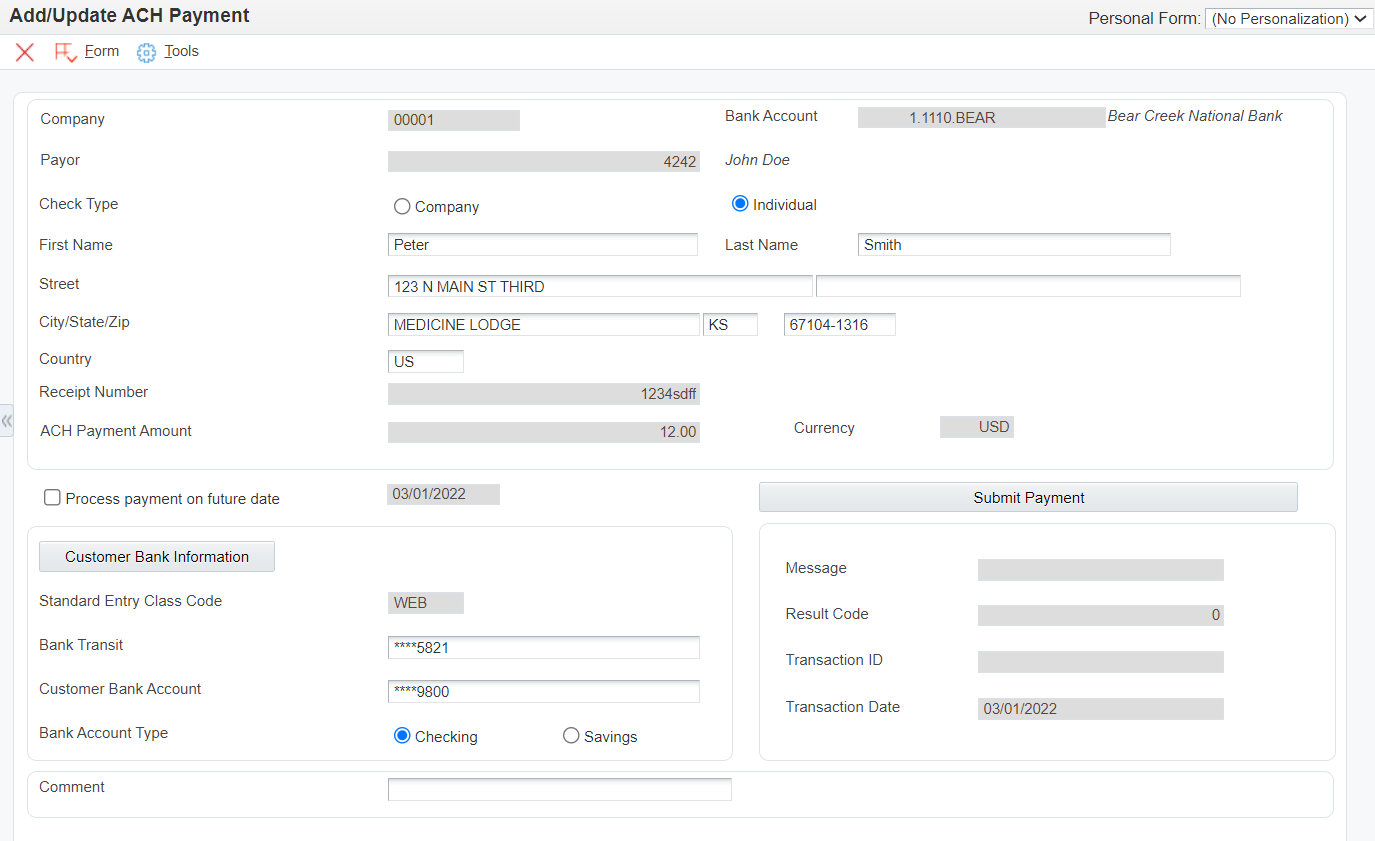
On the ACH payment form enter the information as desired. The individual fields are described below.
Step 3
Post your AR batches as you normally do either manually or in the nightly scheduler.

Did you know that if the ACH payment originated from your website (Invoice Payment) that the Payment Post report (RQ6704203 - single threaded queue) must be executed to create the Z1 record needed for JDE auto-receipts processing?

| Name | Explanation |
|---|---|
| Company | The company number entered in the receipt header. This field is disabled because the information is passed from the standard receipts entry. |
| Bank Account | Bank account number where the receipt will post. This field is disabled because the information is passed from the standard receipts entry. |
| Payor | The address book number for the payment. This field is disabled because the information is passed from the standard receipts entry. |
| Check Type | Determines if the check is a Company or Personal check. |
| Payor Information | The person or company the payment is coming from. This field is disabled because the information is passed from the standard receipts entry. |
| Receipt Number | A number assigned to the receipt for tracking purposes. This field is disabled because the information is passed from the standard receipts entry. |
| ACH Payment Amount | The dollar amount for the payment. This field is disabled because the information is passed from the standard receipts entry. |
| Process Payment on Future Date | When checked you will be able to enter a future date. The date entered will be the date that the ACH process is initiated for this payment. One Time Future Dated ACH functionality is enabled on the ACH Payment tab of the P03B102 Processing Options. |
| Standard Entry Class Code (SEC) | Describes for Forte the classification of the check being entered. This field can be disabled based on Processing Options. For more information on SEC please visit: https://blog.forte.net/sec-code-glossary/ |
| Bank Transit | The bank transit number to be used to identify the bank. This is a required field. |
| Customer Bank Account | The account number from which the funds will be taken. This is a required field. |
| Bank Account Type | A code designating which type of account is being used. Select either checking account or savings account. This is a required field. |
| Comment | An optional text field that is passed to Forte. |
| Message | A display only field that shows the response information from Forte. |
| Result Code | A display only field that shows the result code information from Forte. |
| Transaction ID | A display only field that shows the transaction ID information from Forte. |
| Transaction Date | A display only field that shows the date of the transaction. |
| Submit Payment (Button) | Press this button once all information has been entered and you are
ready to communicate with Forte. Once button is pressed one of two
things will happen: If ACH is approved (result
code 0) then a payment ID is obtained and the payment is recorded in the
ACH payments table. Press save to be returned to the standard receipts
entry screen. If ACH payment is not approved
(result code <> 0) the user must click cancel to exit the form.
Nothing will be written into the ACH payments table. User will be
returned to the standard receipts entry screen to stop processing. |
| Customer Bank Information (Button) | Press this button to access bank account information. Bank account information is maintained using (form exit) standard JDE functionality. |